
Recipe: Perfect Pulled Pork in Six Easy Steps
 Ahhh…Pulled Pork.
The mere mention of the word sets the taste buds tingling, evoking sweet recollections of those tender morsels of meat, that delightful smoke, that sweet, yet tart and spicy sauce.
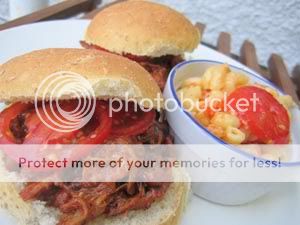
I can’t get enough of the stuff. On a bun. On a pizza with pineapple. Over noodles. As a poutine topping or burger garnish. Its uses are only as limited as your imagination.
I’ve learned to avoid the lineups at Lovey’s. With a little research and ingenuity, you can enjoy all the amazing smokey, succulent flavours of pulled pork anytime at home.
In an August guide to backyard grilling, Savour Winnipeg shows you the secret perfect pulled pork in six easy steps.
 Meat Selection
In the classic barbeque style, pulled pork is cooked low and slow. Partly because it takes time to impart that smokey flavour, but also because it uses a really tough cut of meat.
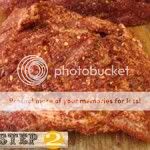
Most recipes call for a Boston Butt, or Pork Butt. It’s actually the shoulder which is laden with connective tissue and fat. It takes a long time for those sinews to break down and the fat to render out, but it also makes this a cheap (and flavourful) cut of meat. A three or four pound piece like the one in the picture will easily feed 8-10 once shredded and sauced, all for under ten bucks, but I’m getting ahead of myself.
Don’t waste time at the big box groceries, you probably wont find butt anyway. Instead, head straight to Millers, Food Fare or Frigs. It’s reliably available and you can rest assured knowing it’s locally raised and reasonably priced. Often on display as a humungous hunk of meat, any of these places will cut it to size for you.
 Seasonings
It’s not essential, but I like to treat my meat to a dry rub–a mix of any spices you think will taste great together. The pros and competition barbequers have closely guarded recipes. My go to seasonings include chipotle chili powder, cayenne, and smoked paprika to name a few. Mix em up and rub them onto the surface of your pork. If they aren’t sticking, a spritz of your favourite hot sauce will enhance adhesion.
You may note from the picture that I’ve broken the butt down. Most pork shoulders are trussed into a roll so it’s a simple step of cutting the strings, and slicing through the thin hinge of connective tissue.
I do this for a couple of reasons. First, efficiency. Heat more easily penetrates the smaller cuts of meat, reducing cooking time. Second, flavour. It provides more surface area for the rub, and smoke to cling to.
 The Smoke Pouch
Whether you season your meat or not, the most important part of pulled pork is that smoke flavour.
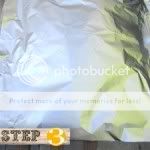
You don’t need a big ass smoker out back. Believe it or not you can get authentic smoked flavour from your gas grill. The secret is the smoke pouch–nothing more that a tin foil envelope of hardwood chips placed over the heat source.
I recommend that you build more than one pouch for the pulled pork method, because we’re talking long cook-times here…5 hours minimum.
For detailed instructions on making a smoke pouch, see Savour Winnipeg’s post: How to Build a Smoke Pouch.
 Grill Setup
This post assumes a two burner, split cooking grate gas grill (with a relatively full tank of propane), but you can easily replicate this on a charcoal grill too.
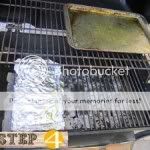
Divide your cooking area into a hot side, and a cool side. The hot side (pictured left) is your heat source, burner or solid fuel. It’s also where you’ll position your smoke pouch. The pork lives on the opposite, unlit or cool side (pictured right).
I like to use an oiled tray (to make removal easier and prevent sticking) and place it on the top rack where the smoke accumulates. Hard core barbeque fans will probably advocate puting the meat right on the rack. It exposes it to more smoke, but I’m terrified the whole works will disintegrate when it’s time to remove it (believe me, it gets that tender!) If you don’t have an upper deck, don’t worry. I’ve cooked on the main grate too and works just fine.
 Now We’re Cookin’
Grill configured, light the hot side and set burner to low. Close the lid and wait patiently until whisps of smoke have begun to escape (you’ll smell it before you see it). Do not rush this step. While there’s much debate on this, I believe most of the smoke flavour is imparted in the first hour. Adding your meat before there’s smoke effectively sears the outside, creating a seal which the smoke will have a hard time penetrating.
Pouch smoking, deposit your pork on the tray, close the lid and find a distraction. This sucker’s gonna take at least 5 or 6 hours (+/-) depending on weight and size. About half-way through the cooking process, you’ll also have to change your smoke pouch. Careful what you do with the discarded packet. There’s still enough heat and embers to do some damage. An errant and carelessly discarded pouch actually set fire to my barbeque last year, hence the mismatched wood / plastic shelves depicted in this post.
Many websites say your pork is done when the internal temperate has reached at least 190°F. I like to let it hold at that temp (or a little above) for a while. But the litmus test here is shredability. Take a couple of forks and try prying a few fibers of the meat apart. If it gives with little to no resistance, you’re done. If you have to put much effort into it, let er cook.
 Pull That Pork
It’s best to rest the meat before you rip it to shreds. Tent it with some foil and give it about ten minutes. Then take two forks and start ripping. How much shredding you do depends on the size of chunks you want on your sandwich, pizza, poutine or whatever. Some folks like to get their hands in there, others use food-safe gloves. Whatever works for you.
The dark crust that has formed during cooking is very desirable. I like to snack on it while I’m shredding. In BBQ circles this is called bark and it’s often accompanied by a layer of pink right beneath. It’s not undercooked meat. The technical term is the smoke ring and a sign you’ve done your work well! You’ll also probably encounter a fat cap. You can discard it or work it in to the rest of the meat…it adds moisture and flavour, but also fat and calories. Your call.
That’s it, you’re done! Use your pulled pork wherever you like…it’s a great vehicle for your favourite sauce. Top it with a store bought one (I like the whiskey infused Canadian Club Hickory) or make your own. And leftovers, sauced or otherwise, freeze particularly well so you can enjoy pulled pork all year round. The secret’s out. Sorry Lovey’s.
No comments yet.